To use alternate ligatures in Adobe Illustrator, you can utilize OpenType features for fonts that support these advanced typography options. Here’s a step-by-step guide:
Note: Click the selected text to apply alternate ligatures
- Open the Character Panel:
- Use the Type Tool (T) to create or select your text.
- Go to Window > Type > Character to open the Character panel.
- Choose a Font with Ligatures:
- Not all fonts support ligatures or alternate characters. Select an OpenType font (OTF) that includes these features, such as Adobe Fonts.
- Enable Standard Ligatures:
- In the Character panel, you’ll see a ligature icon, which often looks like “fi” joined together.
- Click this icon to enable standard ligatures, which will automatically apply any available default ligatures in the selected font.
- Use the OpenType Panel for Alternate Ligatures:
- Open the OpenType panel by going to Window > Type > OpenType.
- This panel provides options like:
- Standard Ligatures: Enables default ligatures (e.g., “fi,” “fl”).
- Discretionary Ligatures: Adds more decorative ligatures if the font supports them.
- Stylistic Alternates: Applies alternate styles for certain characters.
- Swash: Adds decorative flourishes on characters that support them.
- Titling Alternates: Displays alternatives specifically designed for titles or headings.
- Using the Glyphs Panel for Specific Alternates:
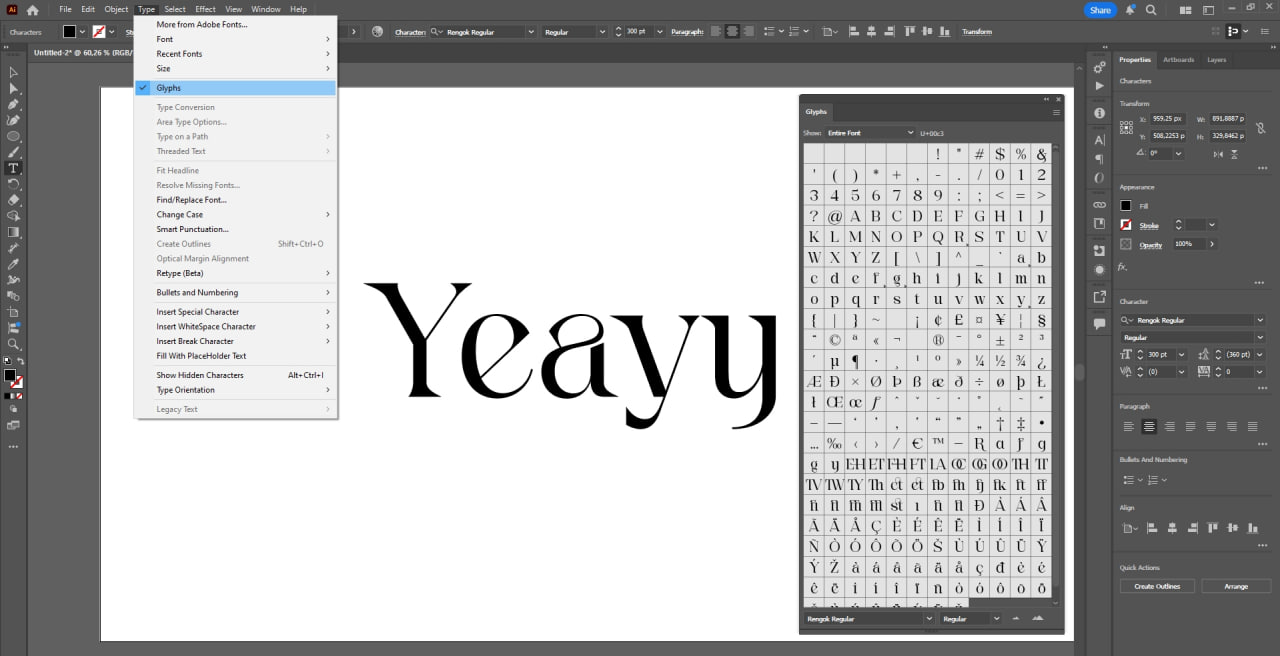
- For more precise control, go to Window > Type > Glyphs to open the Glyphs panel.
- This panel shows all available characters, ligatures, and alternates for the selected font. Double-click any character to replace it in your text.
By using these options in Adobe Illustrator, you can creatively enhance your typography with alternate ligatures and stylish character variations, giving your text a unique and polished look.


